NEC MultiSync LCD195NXM-BK User Manual
Browse online or download User Manual for LED displays NEC MultiSync LCD195NXM-BK. NEC MultiSync LCD195NXM-BK
- Page / 81
- Table of contents
- TROUBLESHOOTING
- BOOKMARKS
- Manual del Usuario 1
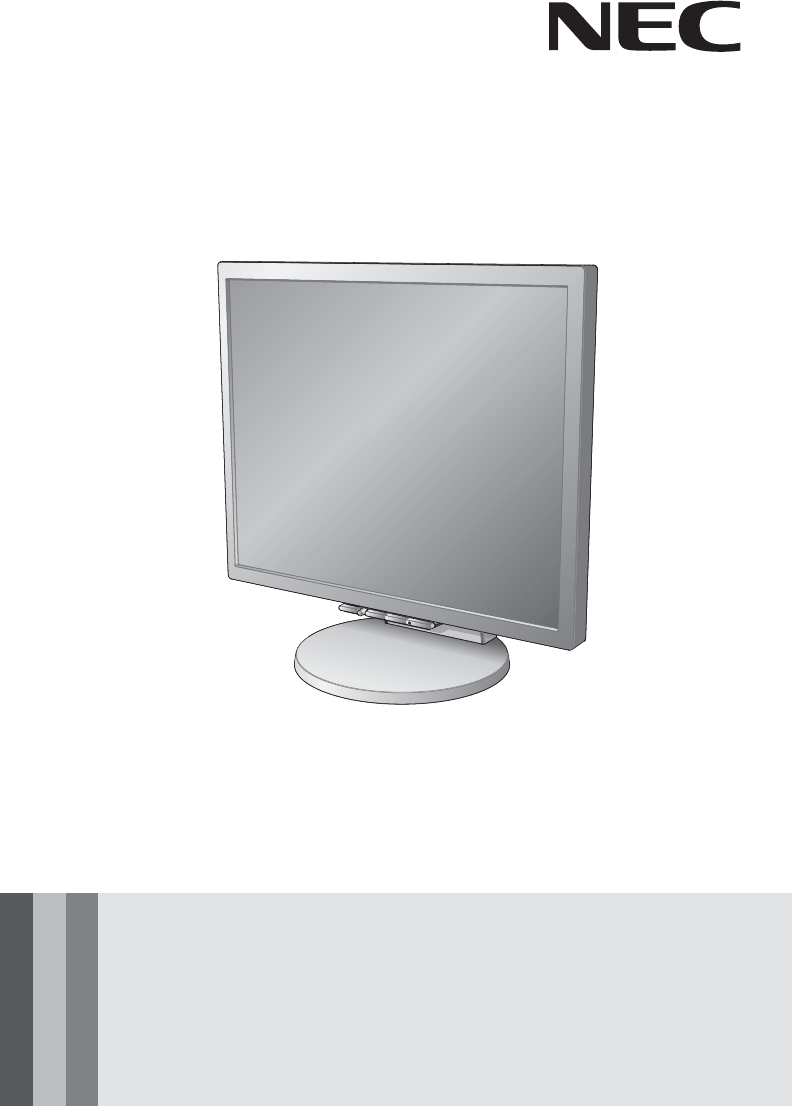
- MultiSync LCD195NXM 1
- FCC Information 3
- Contents 4
- Display Setup 5
- Display Setup - continued 10
- - LCD2070NX, LCD2070VX 11
- Flexible Arm Installation 12
- Controls 13
- Controls - continued 14
- Recommended Use 17
- Recommended Use - continued 18
- Specifi cations 19
- Features 20
- Troubleshooting 21
- References 22
- Limited Warranty 23
- TCO’03 24
- Congratulations! 24
- Disposing of old NEC product 25
- Energy saving 25
- Manufacturer’s Recycling 25
- AVERTISSEMENT 27
- ATTENTION 27
- Informations FCC 27
- contient : 28
- Confi guration de I’affi chage 29
- USB Cable 30
- Câble D-SUB 30
- Figure 9Figure 8 31
- Figure 7 31
- (suite) 32
- Montage 35
- Installation du bras fl exible 36
- 2. Structure OSD 37
- Usage recommandé 40
- Usage recommandé (suite) 41
- Fiche technique 43
- Fonctions 44
- Dépannage 45
- Dépannage (suite) 46
- Références 47
- Garantie limitée 48
- Félicitations ! 49
- Économie d’énergie : 50
- Déclaration du fabricant 51
- Série LCD NEC 52
- ADVERTENCIA 53
- Información FCC 53
- Contenidos 54
- Instalación de la pantalla 55
- - continuación 56
- Figura M.1 61
- Figura M.2 61
- Figura M.3 61
- 4 x 12mm with lock 62
- Controles 63
- Controles - continuación 64
- Uso recomendado 66
- PRECAUCIÓN 66
- Especifi caciones 68
- Características 69
- Solución de problemas 70
- Referencias 72
- Garantía limitada 73
- ¡Felicitaciones! 74
- Información del fabricante 75
- Cómo reciclar su producto NEC 75
- Ahorro de energía: 75
- Declaración del fabricanter 76
- Y DESCARGO DE RESPONSABILIDAD 80
- Serie LCD de NEC 80
- NEC LCD Series 81
Summary of Contents
User’s Manual / Manuel de l’utilisateur/ Manual del UsuarioMultiSync LCD195NXM
8Display Setup - continuedFigure R.1Tilt and SwivelGrasp both sides of the monitor screen with your hands and adjust the tilt and swivel as desired(Fi
9Mounting - LCD2070NX, LCD2070VXTo prepare the monitor for alternate mounting method:1. Place hands on each side of the monitor and lift up to the hi
10Flexible Arm Installation This LCD monitor is designed for use with a fl exible arm. To mount the monitor to a fl exible arm:1. Follow the instructi
11Controls8OSD (On-Screen Display) control buttons on the front of the monitor function as follows:OSM displayedShortcut to bright adjust windowButton
12Controls - continuedAUDIO (LCD175VXM+ Only)Controls the volume of the speakers or headphones.To mute the speaker output, press the “1<->2 / RE
13Controls - continuedOSM®Warning: OSM Warning menus disappear with SELECT button.NO SIGNAL: This function gives a warning when there is no signal pre
14 Brightness/Contrast Controls BRIGHTNESSAdjusts the overall image and background screen brightness. CONTRASTAdjusts the image brightness in relation
15Safety Precautions and MaintenanceFOR OPTIMUM PERFORMANCE, PLEASE NOTETHE FOLLOWING WHEN SETTING UP AND USING THE MULTISYNC® LCD COLOR MONITOR:• DO
16Recommended Use - continuedCORRECT PLACEMENT AND ADJUSTMENT OF THE MONITORCAN REDUCE EYE, SHOULDER AND NECK FATIGUE. CHECK THE FOLLOWING WHEN YOU PO
17Specifi cations MonitorSpecifi cationsMultiSync® LCD195NXM NotesLCD Module Diagonal :Viewable Image Size :Native Resolution(Pixel Count) :19.0 inch1
Warning ...
18FeaturesThin-frame design creates more desktop space for you to work and play, while the fl at screen’s crisp, bright images and crystal-clear text d
19TroubleshootingNo picture• The signal cable should be completely connected to the display card/computer.• The display card should be completely sea
20ReferencesNEC Monitor Customer Service & SupportCustomer Service and Technical Support: (800) 632-4662 Fax: (800) 695-3044Parts and Accessories
21Limited WarrantyNEC Display Solutions of America, Inc. (hereinafter “NEC DISPLAY SOLUTIONS”) warrants this Product to be free from defects in materi
22TCO’03 Congratulations!The display you have just purchased carries the TCO’03 Displays label. This means that your display is designed, manufacture
23NEC DISPLAY SOLUTIONS is strongly committed to environmental protection and sees recycling as one of the company’s top priorities in trying to minim
24Declaration of the ManufacturerWe hereby certify that the color monitors MultiSync® LCD195NXM (L194F2)in compliance with Council Directive 73/23/EEC
30AFIN D’ÉVITER TOUT RISQUE D’INCENDIE OU D’ÉLECTROCUTION, NE PAS EXPOSER CET APPAREIL À LA PLUIE OU À L’HUMIDITÉ. NE PAS UTILISER LA FICHE D’ALIMENTA
31La boîte* de votre nouveau moniteur NEC MultiSync® contient :• Moniteur MultiSync LCD avec sa base ajustable en hauteur• Cordon d’alimentation• Un
32Confi guration de I’affi chage1. Mettez votre ordinateur hors tension.2. Pour le MAC ou le PC avec sortie numérique DVI Branchez le câble de signal
1CAUTION: TO REDUCE THE RISK OF ELECTRIC SHOCK, MAKE SURE POWER CORD IS UNPLUGGED FROM WALL SOCKET. TO FULLY DISENGAGE THE POWER TO THE UNIT, PLEAS
33Confi guration de I’affi chage (suite)Inclinaison de 30˚Positiondu supportla plus élevéeCâble DVIInput1(DVI)DC-OUTInput2(D-Sub)USBdFigure 43. Placez
348. Tenez les câbles fermement et placez la gaine de câble sur le support (Figure 8). Pour enlever la gaine de câble, soulevez le gaine tel qu’indiq
35dedans (Figure 11). Manipulez avec soin en enlevant la couverture de câble. REMARQUE: Si vous utilisez ce moniteur à 125 CA-240 V, veuillez vous re
36Levez et baissez l’écran du moniteurLe moniteur peut être élevé ou abaissé. Pour élever ou abaisser l’écran, placez les mains de chaque côté du moni
37Figure TS.1Inclinaison et pivotementMaintenez les deux côtés du moniteur, puis ajustez l’inclinaison et l’orientation à votre convenance (Figure TS.
38Montage Pour préparer le moniteur à des fi ns de montage différents :1. Placez les mains de chaque côté du moniteur en le soulevant dans sa position
39Installation du bras fl exibleCe moniteur ACL est conçu pour une utilisation avec un bras fl exible.Pour fi xer le moniteur à un bras fl exible:1. Suive
40CommandesLes boutons de réglage OSD® (Sur-Écran Montrer) situés sur l’avant du mo-niteur fournissent les fonctions suivantes :Appuyer surla touche«
41Commandes (suite)LUMINOSITÉRègle la luminosité de l’image générale et de l’écran d’arrière-plan.CONTRASTERègle la luminosité de l’image par rapport
42Commandes (suite)EXTINCTION DE L’OSDLe menu de l’OSD restera actif aussi longtemps que vous l’utiliserez.Dans le menu d’extinction de l’OSD, vous po
2Contents* Remember to save your original box and packing material to transport or ship the monitor.JhZghBVcjVaBjai^HncXA89&.*CMBPower CordMini
43Usage recommandéConsignes de sécurité et d’entretienPOUR UN FONCTIONNEMENT OPTIMAL, PRIÈRE DE NOTER CE QUI SUIT POUR LE RÉGLAGE ET L’UTILISATION DU
44 LA MODIFICATION DE LA POSITION ET DU RÉGLAGE DU MONITEUR PEUT RÉDUIRE LA FATIGUE DES YEUX, DES ÉPAULES ET DE LA NUQUE. OBSERVER LES DIRECTIVES CI-A
45• Veuillez ne pas utiliser du nettoyant OA parce qu’il causera une détérioration ou une décoloration sur la surface ACL.Nettoyage du coffret• Débr
46Caractér. techn.du moniteurMultiSync® LCD195NXM RemarquesModule LCD Diagonale :Surface utile :Résolution (nombre de pixels) :19,0 po19,0 po1280 x
47FonctionsLe design à mince encadrement vous permet de libérer davantage d’espace pour travailler et jouer, alors que les images brillantes et éclata
48DépannagePas d’image• Le câble vidéo doit être bien connecté à la carte d’affi chage et à l’ordinateur.• La carte d’affi chage doit être insérée à f
49Dépannage (suite)Aucun bruit• Le s’assurent que le câble de haut-parleur est correctement relié.• Contrôle de pour voir si le muet est activé.• Cont
50RéférencesService à la clientèle et assistance technique du moniteur NECService à la clientèle et assistance technique: (800) 632-4662 Télécopieur:
51Garantie limitéeNEC Display Solutions of America, Inc. (ci-après «NEC DISPLAY SOLUTIONS») garantit que ce produit est exempt de vice de fabrication
52TCO’03 Félicitations !L’écran que vous venez d’acheter porte l’étiquette « Displays TCO’03 ». Ceci signifi e que votre écran a été conçu, fabriqué, e
3Display Setup1. Turn off the power to your computer.2. For the PC or MAC with DVI digital output : Connect the DVI signal cable to the connector of
53Informations du fabricant relatives au recylage et aux économies d’énergieNEC-DISPLAY SOLUTIONS est extrêmement résolu à protéger l’environnement e
Déclaration du fabricantNous certifi ons par la présente que les moniteurs MultiSync® LCD195NXM (L194F2)conformes à la directive 73/23/EEC du Counseil:
AVIS DE PROPRIÉTÉ EXCLUSIVE ET DE DÉGAGEMENT DE RESPONSABILITÉLes informations contenues dans ce document, y compris tous les designs et matériel s’y
57PRECAUCIÓN: ADVERTENCIA: PARA REDUCIR EL RIESGO DE DESCARGA ELÉCTRICA, ASEGÚRESE DE QUE EL CABLE DE ALIMENTACIÓN ESTÉ DESENCHUFADO DEL TOMACORRIENTE
58Contenidos* Recuerde guardar la caja y el material de embalaje original para transportar o enviar el monitor.JhZghBVcjVaBjai^HncXA89&.*CMBCab
59Instalación de la pantalla1. Apague su computadora.2. Para PC o MAC con salida digital para DVI: Conecte el cable de señal DVI al conector de la ta
603. Ubique sus manos en ambos lados del monitor para inclinar el panel LCD en un ángulo de 30 grados y levántelo hasta la posición más elevada (Figu
61Instalación de la pantalla - continuaciónFigura 9Figura 8Figura 7(modelos NX únicamente)8. Sujete fi rmemente todos los cables y coloque la cubierta
62Figura 10Botón de encendidoFigura 11Instalación de la pantalla - continuaciónManipule con cuidado cuando quite la tapa para cables. NOTA: Si usa e
63Instalación de la pantalla - continuaciónCómo elevar y bajar la pantalla del monitorSe puede elevar o bajar el monitor. Para subir o bajar la pantal
4Display Setup - continuedUSB Cable(NX modelsonly)D-SUB Cable3. Place hands on each side of the monitor to tilt the LCD panel 30-degree angle and lif
64Figura R.1Para inclinar y girarTome ambos costados de la pantalla del monitor con sus manos, ajuste, incline y gire según lo desee (Figura TS.1).NOT
65MontajePara preparar el monitor para métodos de montaje alternativos:1. Coloque una mano a cada lado del monitor y levántelo hasta alcanzar la posi
66Instalación de brazos fl exiblesEste monitor LCD está diseñado para utilizarse con un brazo fl exible.Para montar el monitor a un brazo fl exible:1. P
67ControlesLos botones de control OSD (Administrador en pantalla), ubicados en la parte frontal del monitor, funcionan de la siguiente manera:OSD en p
68Controles - continuaciónAdvertencia OSD: Los menús de advertencia OSD desaparecen con el botón SELECT.SIN SEÑAL: Esta función envía una advertencia
69Controles - continuaciónAUDIOControla el volumen de los altavoces o auriculares. Para silenciar la salida de altavoces, presione el botón “1<->
70Precauciones de seguridad y mantenimientoPARA UN RENDIMIENTO ÓPTIMO, OBSERVELO SIGUIENTE CUANDO INSTALE Y UTILICE ELMONITOR A COLOR MULTISYNC® LCD:•
71Uso recomendado - continuaciónLA UBICACIÓN CORRECTA Y EL AJUSTE DEL MONITOR PUEDEREDUCIR LA FATIGA EN LOS OJOS, HOMBROS Y CUELLO. CUANDOINSTALE EL M
72Especifi cacionesEspecifi caciones delmonitorMultiSync® LCD195NXM NotesMódulo LCD Diagonal:Tamaño de la imagen visible:Resolución nativa(cuenta de pí
73CaracterísticasEl diseño de marco ultrafi no crea más espacio en su escritorio para que pueda trabajar y jugar, mientras que las imágenes nítidas y c
5Display Setup - continuedFigure 9Figure 8Figure 78. Hold the all cables fi rmly and place the cable cover onto the stand (Figure 8). To remove the ca
74Solución de problemasSin imagen• El cable de señal debe estar conectado por completo a la tarjeta de visualización/computadora.• La tarjeta de visua
75Solución de problemas - continuaciónNinguÌ n sonido• Cerciorarte de que el cable del altavoz esté conectado correctamente.• Comprobar para ver si ac
76ReferenciasServicio de atención y asistencia al cliente de monitores NECServicio de atención al cliente y soporte técnico: (800) 632-4662 Fax: (800
77Garantía limitadaNEC Display Solutions of America, Inc. (de aquí en más “NEC DISPLAY SOLUTIONS”) garantiza que este Producto está libre de defectos
78TCO’03¡Felicitaciones!El monitor que acaba de adquirir lleva está certifi cado por TCO’03 Displays. Esta certifi cación indica que su monitor está dis
79Información del fabricante sobre reciclado y energíaNEC DISPLAY SOLUTIONS está muy comprometido con la protección del medio ambiente y considera el
Declaración del fabricanterPor la presente certifi camos que el monitor a color MultiSync® LCD195NXM (L194F2)cumplen con Directiva municipal 73/23/EEC:
6 NOTE: If you use this monitor at AC125-240V, please refer to Recommended Use section of this manual for proper selection of power cord.10. Turn on
DECLARACIÓN DE DERECHOS DE PROPIEDADY DESCARGO DE RESPONSABILIDADLa información divulgada en este documento, incluidos todos los diseños y materiales
PROPRIETARY NOTICE AND LIABILITY DISCLAIMERThe information disclosed in this document, including all designs and related materials, is the valuable pr
7Display Setup - continuedRaise and Lower Monitor ScreenThe monitor may be raised or lowered. To raise or lower screen, place hands on each side of th
Related products and manuals for LED displays NEC MultiSync LCD195NXM-BK


 (131 pages)

 (2 pages) (46 pages)
(16 pages)
(52 pages)
(19 pages)
(54 pages)
(33 pages)
(2 pages) (46 pages)
(16 pages)
(52 pages)
(19 pages)
(54 pages)
(33 pages)
© 2020, manymanuals.com. All rights reserved. | 1.477 s |
 Manymanuals.com
 Manymanuals.de
 Manymanuals.fr
 Manymanuals.it
 Manymanuals.pl
 Manymanuals.cz
 Manymanuals.es
 Manymanuals-pt.com
Comments to this Manuals